Getting started in Autodesk Revit can be a daunting task. There are so many articles, videos, and tutorials out there to weed through to find the information that is actually important to get started. So, where do you begin?
Autodesk offers two versions of Revit and a software package that contains more products for a variety of uses. Let’s take a look at what these options are. Revit LT is a stripped-down version focused on the architectural and structural sides of the program. Revit gives all the capabilities of Revit LT, plus the ability to model MEP elements. Autodesk AEC is the full collection of Autodesk products including Civil 3D, AutoCAD, Revit, Navisworks, among many others for Architects, Engineers, and Construction (AEC) individuals. Autodesk also offers a free, 30 day trial of their software applications. Sweet!
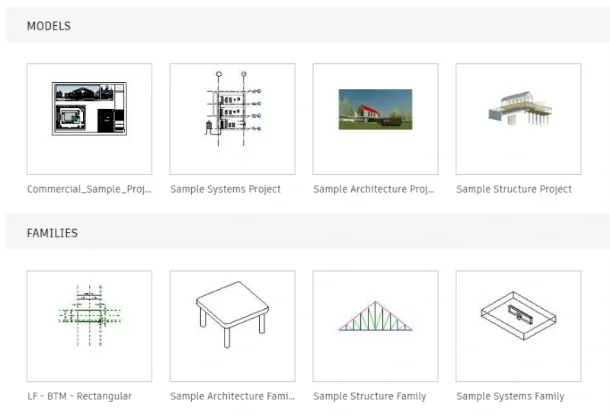
Now that we have a brief understanding of the software options, let us open the full version of Revit. Once you have Revit downloaded and installed, open the application and let’s take a look. The first things you will see are the following sample models and families within the Revit window. For this blog, I will be opening the Commercial_Sample_Project.rvt by clicking on the icon above the project name.
![]()
There are many sections within Revit and each of them provides access to different categories of the program – let’s review what each of these sections contains. The very top of the program window is the Quick Access Toolbar. This toolbar is customizable so you can organize these tools in a way that makes sense for your use. To customize the QAT, right-click on any of the icons and another window will open. You can move the icons, add separators or delete the tools you do not use. Additionally, you can move the QAT below the ribbon.

Just below the QAT is the Ribbon. The Ribbon organizes each of the toolsets into categories or tabs with the label of what they can be used for. My screenshot has a few additional tabs because I have installed some third-party software, so do not be alarmed if you do not see the “Add-Ins” or “UNIFI” tab. Most of the tabs are fairly self-explanatory for the toolsets they contain. Architectural contains tools to create architectural elements; walls, doors, windows, floors, etc. The structural tab is all structural elements, the Systems tab is all MEP Systems, and so on.

The Project Browser window contains all the created views (floor plans, RCP, sections, elevation, 3D views, detail views, area plans, etc.) and is grouped based on the base type of view. The grouping can be customized in ways that make sense for your workflow and the particular project you are working on. Creation of Legends, Schedules, Panel Schedules, and Sheets will automatically be grouped in these categories. Families, Groups, and Project links can also be found in the Project Browser. There is also a search function in the Project Browser – all you have to do is right-click anywhere in the window and select search.
The Properties window provides additional parameter information for the currently active view or the element(s) that are selected. The parameters that are visible will change depending on what type of element is selected. Additionally, the number of elements selected is displayed in parenthesis in the Properties window.

Accidentally closed the Project Browser or Properties window? Not to worry, you can turn these windows back on. Under the View tab is one location to find the User Interface. The UI controls the visibility of important windows for the Revit experience.

In the lower right corner of the Revit window, the selection tray options are; select links, underlay elements, pinned elements, select by face, drag elements on selection, background process, and filter. Changing the option to select the various components helps greatly in selecting only the elements you want to. For instance, after linked files are in the project, most often, there is no reason to select them again. Having the red X above any of these icons means you will not be able to select that type. The ‘drag elements on selection’ should always be turned off IMO because when I move an element, I want it to be intentional, not accidental. I leave select by face and drag elements turned off as a standard and adjust the others as needed.
This was a brief introduction and we still covered a bunch of the tools and locations of these options within Revit. There is a whole lot more to explore. Next week we will cover how to adjust and dock the menu windows, opening a view, the additional options once a view is active and what they mean, selecting and filtering objects within a view, to name a few.
Struggling to find the menu or toolset you are looking for? Do you have Revit questions that have been annoying you for a long time? BIMTM offers training services and we would be happy to help you learn more and get comfortable with Revit and become a true badass!

